If you are wondering how to pump a bike tire, you’ve come to the right place. Although pumping a bike tire is not rocket science, you still need to know how to properly inflate your squishy or flat tire so you can get the most out of your trip. In this article, we are going to touch on a couple of points:
- How to know what valve type is in your bike tire
- How to determine the right bike tire pressure for your ride
- The proper techniques on how to pump a bike tire
Let us begin.
Understanding Valve Types
Most bicycle tires in the market come in either one of the two most common bike tire valve types: Presta valve or Schrader valve.
A Schrader valve is the same as those found in car tires. Compared to Presta valves, Schrader valves are more common, especially in the least expensive bike models. Schrader valves are wider and usually have the same width from top to bottom. The outer wall of the valve is threaded to accommodate a pump head. It has a spring-loaded pin in the center that controls the flow of air.
A Presta valve, on the other hand, is made of metal throughout. Its diameter is half as that of a Schrader valve and they come slightly tapered to the top (although some models are threaded from top to bottom). Presta valves don’t have a check pin that controls the flow of air. To open the valve, you simply unscrew the nut at the top.
Know the Right Tire Pressure for Your Bike
To pump your bike tire effectively, you must know how to determine the right pressure for your bike tire. And it’s really easy! All you have to do is check the sidewall of your tire. You should see the range of tire pressure (in psi) that your bike tire can handle. Most mountain bike tires can hold between 25 to 50 psi of air. Road bikes, on the other hand, can hold between 80 to 130 psi. Your weight and riding style matters too. So, we’ll leave it to you to experiment on what’s the best tire pressure for you. Just make sure not to go under or over the limit of your bike tire!
Your Step by Step Guide on How to Pump a Bike Tire
Now that you know the type of valve your bike tire has and its lower and upper limit of air pressure, you are finally ready to start pumping! Here’s how to do it:
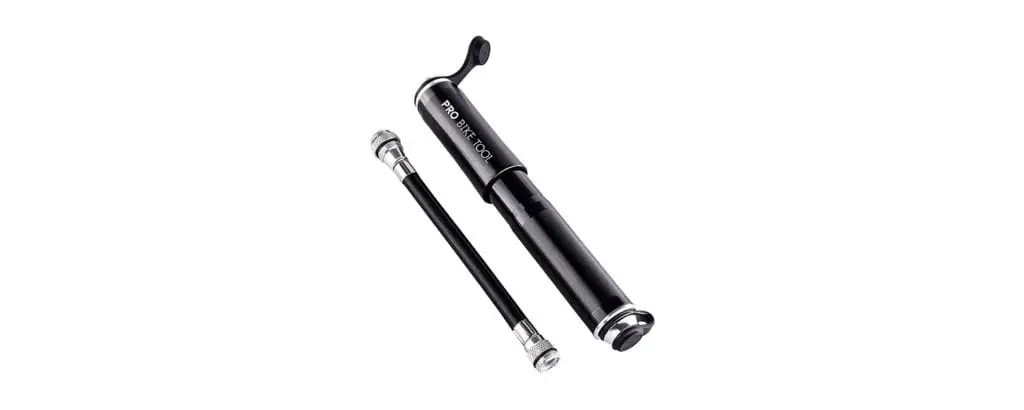
1. Get the right bike pump
Make sure you get a bike pump that is compatible with your bike tire valve. Remember that some bike pumps are for Schrader valves or Presta valves only. Most bike pumps in the market work for Schrader valves. If you happen to have a Presta valve, get an adaptor to make it work. You can pump your bike using a hand pump or floor pump — choose which one works best and is more readily available for you.
2. Unscrew the valve cap
Both Presta and Schrader valves come with a plastic cap that protects them from debris and dirt. Unscrew the valve cap and store it somewhere safe, like in your pocket. Remember that Presta valves have a lock nut! Unscrew this too and then turn the valve several times to open the valve before attaching the pump.
3. Attach the bike pump
Bike pumps have two types. Floor pumps are great if you have a garage and don’t go out on your bike that often. Floor pumps have high capacities — most of them can pump up to a maximum pressure of 160 psi.
If you use your bike for commuting to and from work or if you love cycling long distances, then a mini pump or hand pump is a great investment. Because of their portable size, hand pumps don’t have large capacities but should still be more than enough for what you need.
Most bike pumps nowadays come with two nozzles for both Presta and Schrader valves. If your pump happens to only have one, let’s say a Schrader, you will need to purchase an adaptor to make it work with a Presta valve.
4. Inflate your bike tire
If you are using a floor pump, place your feet on the sides, pull the lever, and then begin pumping with both hands. For hand pumps, use one hand to pump and then your other hand to hold the nozzle in place.
If your pump doesn’t come with a pressure gauge, we strongly suggest getting one so you know exactly how much air pressure your bike tire has. Never “eye” the tire pressure!

5. Detach the pump from the valve
Stop pumping air once you have reached your desired tire pressure. Some pumps may require you to push a lever down to detach the pump from the valve. Don’t panic if you notice some air escaping when you remove the pump. This is perfectly normal and should not have a significant impact on your bike tire pressure.
6. Secure the valve
You are almost done! If you have a Presta valve, screw back the lock nut and make sure that is securely in place then screw in the dust cap. For Schrader valves, just simply place the dust cap back on.
Bonus Tips:
1. If you overinflated your bike tire, you can simply correct the tire pressure by pressing your Schrader valve with your fingernail to allow some air out. For Presta valves, open the lock nut and press on the valve.
2. How do you know that you’ve pumped enough air in your tire? Well, if you’ve pumped within the limits of your bike tire, the tire should feel firm. If it’s too soft, you might have underinflated it. If it’s too hard, you might have overinflated your tire.
And we are done! Now you know how to pump a bike tire. It takes some practice to know these tips by heart. I hope it helps!
Happy biking!